Draft Cycle Works

Showing posts with label Clutch. Show all posts

Sunday, March 14, 2021

Survivor Chop: Clutch Repair

This one is short, but important.  When removing the clutch, you can use a pair of channel locks to keep the basket from rotating as you use the clutch nut tool to remove the nut.  Same for reinstallation. Just use the sides of the jaws to resist the rotation by placing them against the flat bosses next to the springs and pressure plate posts. Clutch nut torque is 33 - 36 ft-lb.  When removing or installing the pressure plate, be sure to tighten or loosen the 4 bolts evenly.  The pressure plate breaks easily when this is not followed.  I've only ever broken one... this one... out of many.  But I'm usually careful.  The proper torque for the pressure plate bolts is 6 - 7.5 ft-lb.

Removing clutch nut.

Ensure that the pressure plate bolts are evenly loosened or tightened.  When installing, make sure that the plate is moving down onto the clutch hub studs properly to avoid the bolt clamping down prematurely on the wrong surface and potentially leading you to snapping the pressure plate.


All steels should have the sharp edge facing inward or at least in the same direction.  I placed a v notch on each of the oiling holes in the clutch hub to aide with oil collection.  This is a tip from Hondaman that I did on my heavily built 836 in Rock Flute and there was slightly noticeable difference in the smoothness of the clutch.  Before doing this, the clutch was grabby and neutral was impossible to find. Cut the V groove so oil is funneled into the oiling holes.  I.e. on the left side of the holes when looking at the bottom of the inner side of the clutch hub.  The clutch rotates clockwise.

Clutch parts cleaned and inspected.  Note the v grooves in the hub at the top left. Not the prettiest work, but it seems to help.


Tuesday, May 19, 2020

Freshening up a Survivor CB750 Chop

1972 CB750 survivor chop headed to the shop for some work
                             
   
After buzzing around on the CB550 for a while, I decided to make a deal with John at DCW and traded it for a survivor chop that he picked up a while ago.  I'm glad the 550 will still be around.  The kids loved working on it and we have plenty of good memories with it in the family.  But, onto new things. Adios, good buddy.

Uncle Mike's restored 1978 CB550 headed over to John's

Imaginary road trip to Arizona to visit their cousin
The bike under the microscope is a 1972 CB750 in a trailing plunger frame, equipped with a springer, mini disc, spoke wheels, 6 bend bars, factory wiring, factory controls, factory turn signals, and a bunch of other factory bits.  It was a quality build from the 70's that must have used a kit that swaps over a lot of the factory items.  The factory light cluster is even mounted between the custom risers that John made to fit the narrow 6 bends to the springer riser spacing.  My plan is to retain all of the factory items, clean the bike up, and do a few upgrades for safety and reliability.

Factory indicator dash and wiring repair in progress

The frame is conservatively molded, with a great layered paint job.  It needed a good bath, some fresh paint on the engine, a little wiring, and a few mechanical fixes.  Otherwise, it's in great shape for being nearly 50 years old.  The first thing I took care of was the bath.  It was covered in a nice layer of road grime and dust. What looked like bad chrome was really just aged chrome with a lot of dirt.  

After it was relatively clean, I fixed the wiring in the cluster that the owner John bought it from had modified.  This gentleman decided to extend the wires for the for the factory controls so he could fit some apes.  The apes didn't look right and were the first thing to go when John got the bike.  I finished properly crimping and extending the wiring, then added a fiber loom to keep it organized and tidy.  I had to rebuild a set of control housings and buttons from a couple sets because the original ones were worn out. I cut out a hole for the wiring to exit the throttle housing on the front, close to the brake perch, because the bars were not dimpled like factory bars.  The picture of the factory light cluster above shows the new looms, cables, and factory controls midway through the process of wiring.

While working on gathering a few parts, I've begun stripping items off the engine to fix the peeling top end paint.  At some point, someone painted the top end black, but seemed to have skipped surface prep altogether.  The carbs were pulled and will be cleaned/inspected and new fuel lines will be routed. The exhaust and brackets will be cleaned and the hardware will be upgraded for a tighter fit.  The long pipes have a joint just behind the mid controls that is slugged with a piece of black pipe.  It fits nicely, but the small #10 hardware allows for a little more movement in the kickup section of the pipes than I like.  No one likes to see floppy pipes on someone's bike when you're trailing behind them... just waiting for them to pop off and find their way under your tire.
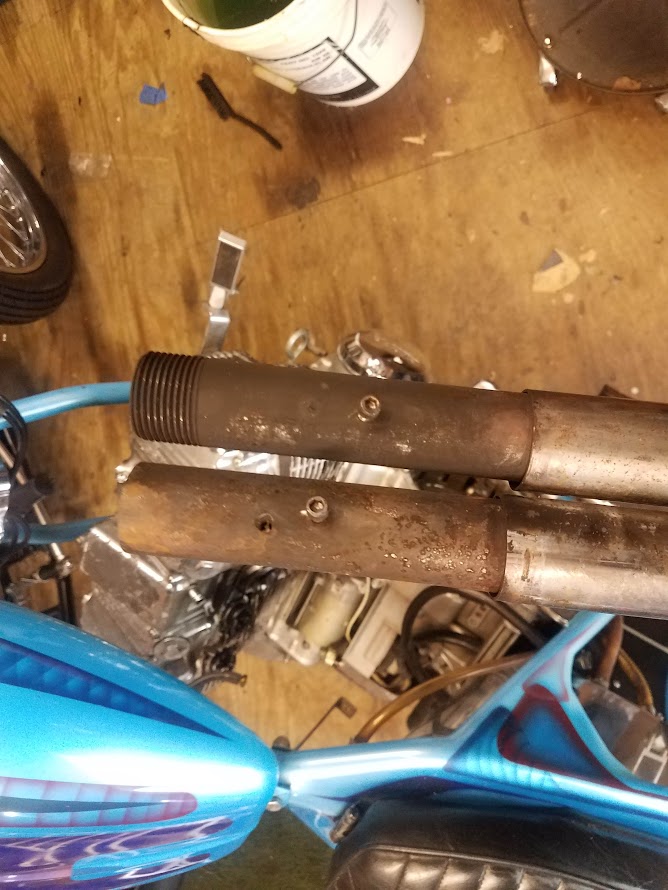
Black pipe inserts for 4-4 exhaust kickups


On the first trip around the neighborhood to give the kids a little ride, I noticed that the clutch was dragging quite a bit.  With the engine off, in first gear, clutch in, rolling the bike would spin the engine.  It certainly needed an oil change, but since I'm replacing the crusty chromed covers with polished aluminum ones, I decided to inspect the clutch.  Upon disassembly, I found 2 of the 4 pressure plate bolts were snapped off and only being held in by some mysterious material, possibly galvanic corrosion.  The clutch fibers, steels, springs, and basket were in great shape.  Perhaps a little flex in the pressure plate along with a very sticky motor oil was causing the drag.  At this point I'll be installing a new clutch plate because 2 of the posts are filled with steel studs and the other two are likely damaged because the bolts were significantly over-torqued.  While the clutch center is out, I'll add "V" grooves to the oiling holes to increase film capture and aide with oiling the clutch (a la Hondaman).
Grungy engine and dis-assembled clutch

Clutch plate with damaged posts

This is a long intro for the new addition.  Eventually we might come up with some ridiculous name for the bike instead of "the blue bike," so it can join the ranks of Rock Flute, Bat Vagina, and War Bagel. Usually only the bikes that hang around for a while get a name.  I expect to hang onto this one for a long time.

To Do:
- Clutch: Finish repairing the clutch, scuff the steels, V groove the clutch center, properly torque pressure plate bolts to 6-7.5 ft. lbs and the clutch nut to 33-36 ft lbs.
- Dress Engine: Prep and repaint the top end to factory aluminum, install new polished covers.
- Brakes: Source front brake lines and fit new radial master cylinder (slim fit with the 6 bends), replace caliper stay.
- Exhaust: Upgrade hardware on exhaust pipes and add spacers to rear bracket to raise exhaust 1/2".
- Chain Guard: Replace or clean and properly secure.
- Speedo/Tach Install: Add mini speedo and tach with custom drive cables (factory speedo drive).
- General Maintenance: Clean/inspect/sync/document carbs, set valve clearance, timing, cam chain tension, oil change. 
- General bike inspection: Put a wrench on everything, check brakes, check lighting, check tires/wheels, check fuses, check all soft and hard components, etc.
- General upgrades and repairs: Weld wider plate to kickstand and a bunch of unknowns.
- Clean and Polish: shine paint and metals, treat soft components, restore rubber/plastic coloring.  Buffing wheel, polishing compounds, silicone treatments, rubber softener, etc.
- Bunch of other little things:  All those things I cant think of right now.

Wednesday, October 13, 2010

How To Inspect and Reassemble a Clutch Pack Assembly... The Right Way.

The following is a 'how to' from a mechanic with over 30 years of experience, including production road racing and drag racing. The basic premise of the method was introduced to him in an old manual. This method will maximize the performance of your clutch. It will reduce rattle, wear, slip, and increase lever control.

This is long but it's worth it.


Let me begin by saying that this will not only work for any Honda, but for other wet (or dry clutch) brand brand bikes you also own. This is pretty much universal as far as multi-clutch pack assembly goes. This is a generic clutch/friction assembly procedure, and does not entail all aspects of troubleshooting clutch drag, failures, lubrication assembly, torque specs, hard part inspections, etc.

Basically, this article points out "two special steps" for clutch assembly. I have included a minor plate inspection/assembly, and a clutch adjustment procedure. It is totally optional for those who would like to experiment.


I will open with the clutch adjustment, by stating that it will probably raise eyebrows in the way I set my final clutch lever, and adjuster throw-out screw positions.
I used this same lever/ throw-out adjust system on my 1100GS BMW. I've heard about all the negative complaints about the BMW clutches not lasting. Believe me, I am not the nicest person when it comes to riding. It goes back in the barn soaking wet. The BMW clutch never slipped, never lost it's free-play at the lever, could carry the front wheel through most gears, and clocked 36K "hard" miles before it was sold. Not one problem ever occurred with the clutch system or had it's related parts fail, snap, break or ever replaced.

Not that I will tell you to do this on your bikes, but I used "Zero" free-play on my BMW, as well as all other clutch levers in my stable of bikes. There is literally nothing (1/16-1/8" freeplay) there. Once you pull on the clutch lever, the throw-out pin is pushing on the pressure plate right then and there. I also never pull the clutch in all the way to shift. I hardly move the C-lever upon foot selection. Neutral is the easiest click to find.

With that said, Here is how I have set up my clutch plates for all my race bikes, customer, and personal street bikes. Customer clutch lever freeplay were of course, set per book specs.


Steel Plates:


When the Manufacturer makes the steel plates from a raw sheet of metal, they stamp out these parts. You will notice a round edge, and a flat edge. One side you can easily cut yourself with. This is the part (cut edge) you want to look for. Some steel plates will have the special riveted (chatter) plate placed somewhere in the middle, or along somewhere in the pack assembly. Remember to note the cut edge of this plate assembly as well.


The steels have what's known as "Memory". Because of the stamping, the curve of the metal will be in one direction. To illustrate this, place your palms against each other and touch your fingers as if you were praying to your chosen Deity. Now press your fingers against each other. Notice how each finger fights the other. Now place the palm of your hand over the back of your hand. Press you fingers over your other fingers. Notice how they move in the same direction and not fight each other? This is the same example for the steel frictions.
PLACE ALL STEELS IN ONE DIRECTION. This is the "first" of two keys to clutch assembly steps.

If you place the steel's cut-edge all in the same direction, they will not fight each other. In other words, one cut edge will not be facing the other against a friction, and the steel plate on the other side (of the friction) will not have to cause extra drag on the fiber plates as the pack is released. This is one of the reasons it is hard to find neutral. You have an ever so slight clutch drag of the bike. The touching load is moving the bike forward when you have the clutch lever pulled in all the way. It is somewhat of an exaggeration, but please understand the point...this is dragging the clutch pack in a subtle way.


Indiscriminately installing the clutches in any ol' direction, will give poor performance to the whole clutch pack assembly.
This is not the main reason, but a contributing reason why clutches do not last long if installed incorrectly. There is a percentage loss to compression of the clutch assembly when a steel or friction is facing in the opposite direction, and not lined up in it's "Memory" facing assembly. The loss is slight, but insufficient clamping or holding. The steel in the wrong direction is forming a gap against the friction side of the other steel in the correct direction. To illustrate this...touch your finger tips again, and look at the gap between your palms. This is somewhat of a poor illustration on my part, but it is theory none the less, to show you how a steel plate reacts when placed opposite each other, as opposed to both in the same direction.


Friction Plates:


The single style spiral friction plate will be obvious as to their direction of assembly. This is the centrifugal pad cut direction, to fling off the oil between steel and frictions. Follow the friction "spiral pad cuts" for correct direction. Other frictions will have to be inspected for their stampings if the pad material is in the "square type design cuts". The aluminum plates (direction) might be harder to recognize. There are a few visuals to look for. Note the directional spiral plate and match the stamping this way with the other friction plates. Some will have a printed ink stamping on one side of the aluminum plate. Use this as your guide. Some aluminum frictions will have a cut edge to them. As long as the uniformity is consistent and in one direction, you have a better chance that the frictions will act in a consistent manor, than just throwing each friction in the (clutch outer) housing in any direction. Just look for consistency with each friction, and place them all (friction and steels) in the same direction.


Steel/Friction Plate Inspection:


If you feel that all the steels and frictions are lined up together and you still find there is drag or it's hard to find neutral, then most likely there is one or two warped steels or frictions causing the problem. Of course you can go by the book, place each steel on a flat surface and check warpage with a feeler gauge. This is one way of making sure you find a faulty steel plate. Another inspection, is to line up all the steels in it's memory direction (cuts all facing in one direction) and hold them all (on top of each other) in your hand in a stacked (static) formation. You simply turn the steels (all at once) and inspect for a gap between each other. If you find one, remove it. Then rotate the stack again to look for all the steels to lay flat on each other without any gaps between them. You will shuffle the stack repeatedly and make sure that a steel that was on the bottom, is now somewhere in the middle, as well as the top steel placed at a different levels.... and again, rotate the whole pack, looking for gaps. Once you have done this to just about every steel/friction plate being placed at all location levels, you can determine if they will be reusable. Discard those that cause a gap. Finally, check for the steel and friction (thickness) "serviceable limit" measurements, and are within specs.


Clutch Assembly Placement:


It is critical that the frictions and steels directions are facing the "Pressure Plate." Let's say you have another Metric bike that has the pressure plate being the last installed part into the clutch outer cage. Then if that is the case, all (cut) friction and steel plates... "FACE THE PRESSURE PLATE." This is the "second" key point of this article.
If the pressure plate is the first part (like CBX-F's) to be installed inside the clutch outer, then all cut edges face (inward) to the pressure plate. So no matter what design you have, always face the... "steel/friction cut edges toward the pressure plate." As stated above, spiral style pads are placed in clutch assembly rotation. In other words, if the clutch spins counter-clockwise, then the spiral pads facing you is in the forward slash (/) position. Note how the spiral friction would rotate to fling the oil outside of it's groove. If the clutch pack rotates clockwise, then reverse the spiral pointing is in the back-slash (\) position.


Clutch cable/ throw-out adjustment:


Here is where the adjustment for some of you becomes scary. Run the thumb wheel and knurled end adjuster all the way in at the clutch lever housing, so no threads are showing. Go down to the end of the clutch cable and apply the same adjustment to the bolt and nut cable ends. Run the nut and adjuster up to the cable end and hide the threads. This should be where the cable is at it's loosest position.


Loosen the lock nut and turn the throw-out screw "in" until it lightly seats. Do not go any further but to touch the clutch lifter assembly. You know you are going in the right direction with the screw, if you watch or feel the lever arm begin to "move down" as you screw the adjuster screw in the correct direction. Turn the screw out 3/16ths to 1/4 turn if you are brave, or book spec if you rather feel safe in your mind. Lock the nut down, making sure the screw does not move as your set the nut.


Take up most all of the cable slack by lengthening the cable adjuster threaded end at the clutch lifter arm. Keep feeling the clutch lever until you feel the cable free-play being taken up at the hand lever. Once you can feel a 1/16th to an 1/8 inch of free-play at the lever/housing, lock down the nut on the bottom cable adjuster. Your final adjustment will be at the thumb wheel and knurled screw at the handle bar.
If you feel you rather stay with the required lever gap from the factory manual, you may now make your final adjustment per book specs.

If you rather experiment with a tighter clutch lever, then run the knurled screw out to the point where there is no free-play. The lightest touch to the lever will not create a gap between the housing and lever pivot. This is an extreme setting, and may cause clutch slippage if not properly set. The text here might throw you off as to how it is to be adjusted. You will have to experiment to know the "feel" where it is safe to have a tight cable and not so tight, as to load the clutch push rod where it is about to be disengaged.


Conclusion:


Anyone who installed their clutch pack recently, and indiscriminately installed the steels without this basic installation process, my want to reevaluate the assembly. You may find you still have a hard time finding neutral after you install all new parts.


The way to install the steels (and frictions) described above, will help the longevity to the clutch pack, and give you some of the smoothest shifts, as if the bike was as new as the day you bought it. Finding neutral will also be one of the chief benefits to this clutch assembly/lever pull.


Remember to inspect the steels/frictions for warpage. No matter how well you followed directions and execution, one warped steel/friction will not "cut' it.

Monday, October 11, 2010